5 Steps to Upgrade Your Charlotte Home’s Lighting (Without Breaking the Budget)

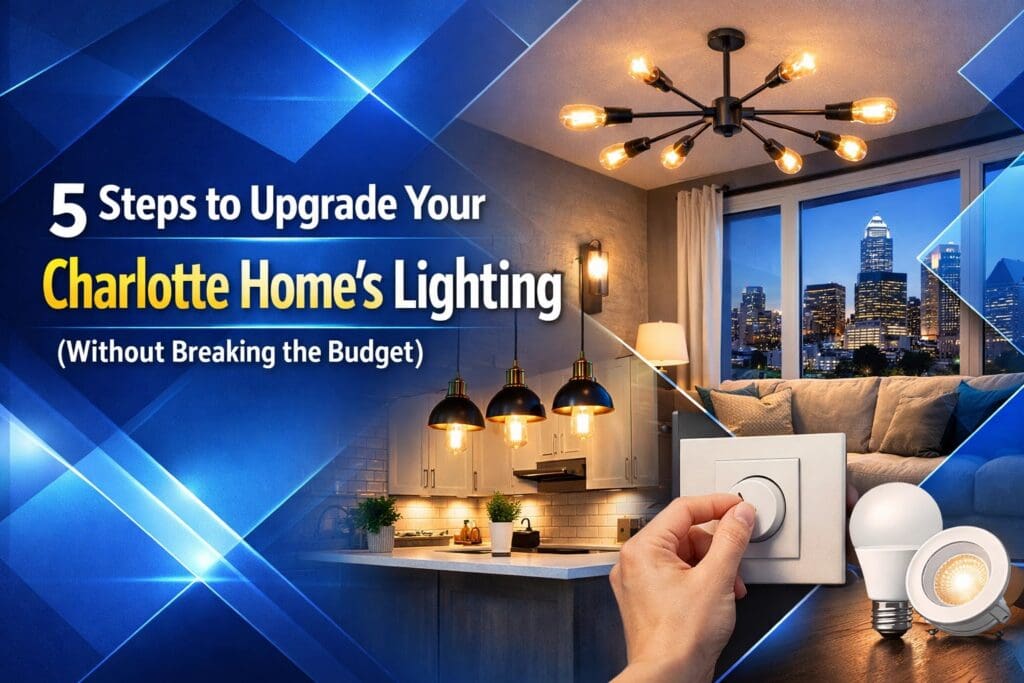
Most Charlotte homeowners think upgrading their lighting means gutting rooms and spending thousands. That’s not true.

Smart lighting upgrades deliver major impact without major expense. You can transform how your home looks and feels, reduce energy bills, and increase property value with strategic, budget-conscious changes.

Here are five steps to upgrade your Charlotte home’s lighting without breaking the bank.

Step 1: Convert to LED Throughout Your Home

This is the fastest, easiest, and most cost-effective lighting upgrade you can make.

LED bulbs use approximately 85% less energy than traditional incandescent bulbs. They last 15-25 times longer. And they’ve come down dramatically in price over the past few years.

Why LEDs matter for Charlotte homes:

Your electric bill. Charlotte summers mean air conditioning running constantly. The last thing you need is lighting that generates heat and drives up cooling costs. LEDs run cool and slash energy consumption.

Longer lifespan means fewer replacements. Incandescent bulbs burn out every 1,000 hours. Quality LEDs last 25,000-50,000 hours. That’s years of use without climbing a ladder to change bulbs.

Better light quality. Modern LEDs offer warm, natural light that rivals traditional bulbs. You’re not stuck with that harsh, cold light from early LED technology.

Where to start:

Replace your most-used lights first. Kitchen, living room, bathrooms, and outdoor fixtures get the most use and deliver the fastest payback on LED conversion.

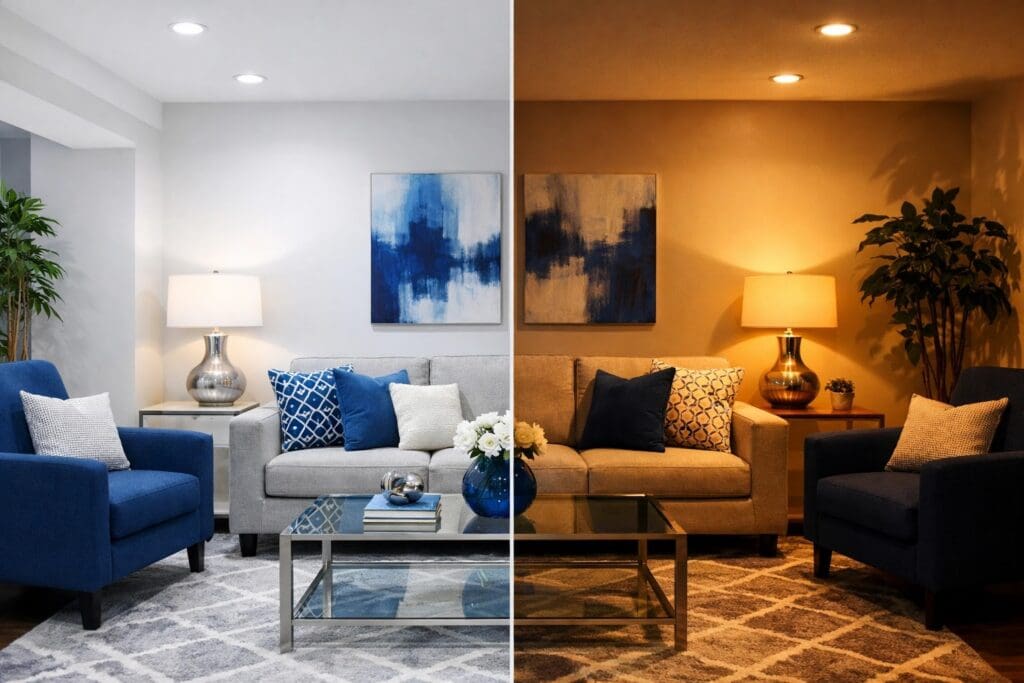
Match color temperature to the room. Use warm white (2700K-3000K) for living spaces and bedrooms. Use bright white (3500K-4100K) for kitchens and workspaces. Use daylight (5000K-6500K) for garages and outdoor security lighting.

Consider smart LED bulbs for rooms where you want dimming or color control without rewiring. These connect to your phone and cost only slightly more than standard LEDs.

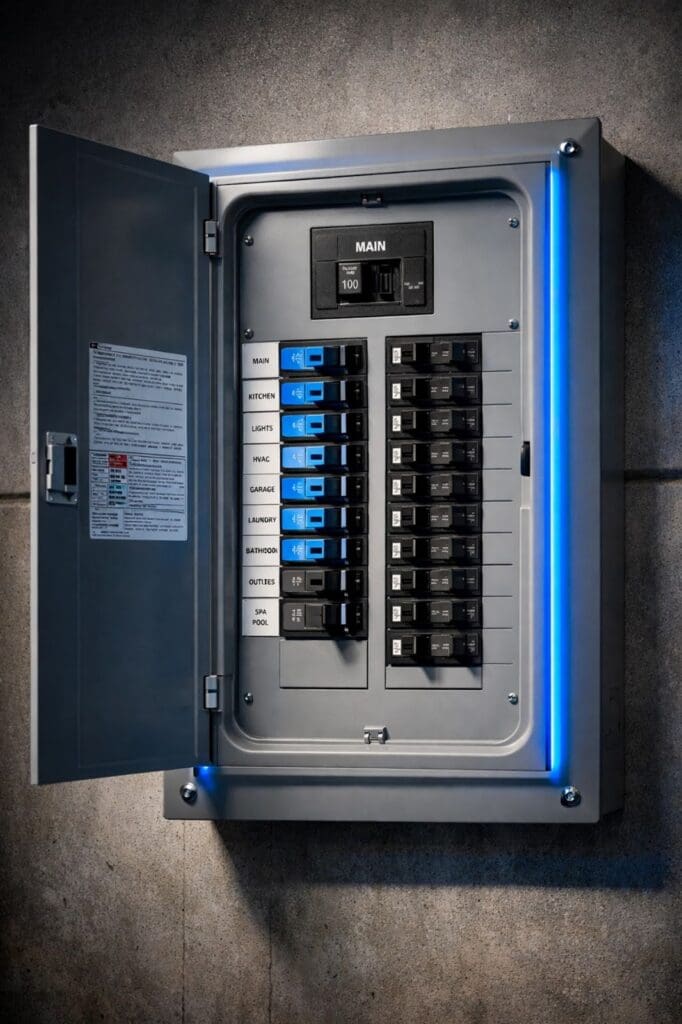
Step 2: Install Dimmer Switches and Smart Controls

Here’s a secret: changing how you control your lights often matters more than changing the lights themselves.

A basic dimmer switch costs $15-30. Installation takes 15 minutes for a licensed electrician. But the impact is immediate and dramatic.

What dimmers do for your home:

Mood and ambiance. Bright overhead lighting is harsh for watching TV or entertaining. Dimmed lighting creates atmosphere without buying new fixtures.

Energy savings. Dimming lights by just 25% cuts energy use by approximately 20% and extends bulb life significantly.

Flexibility. Morning coffee needs different lighting than evening wine. Dimmers let you adjust for time of day, activity, and mood.

Smart switch upgrades:

Smart dimmer switches connect to your phone, voice assistant, or home automation system. They cost $40-80 each and offer features like:

  • Scheduling lights to turn on/off automatically
  • Creating lighting scenes for different activities
  • Remote control from anywhere
  • Integration with motion sensors and other smart home devices

Where to install dimmers:

Dining room. This is the most impactful location for a dimmer. Bright for homework, dimmed for dinner parties.

Living room. Overhead lighting that dims lets you adjust for TV watching, reading, or entertaining.

Bedrooms. Dimmed lights before bed help you wind down. Full brightness in the morning helps you wake up.

Kitchen. Dimmers over islands or breakfast areas create flexibility. Bright for cooking, dimmed for casual meals.

For professional lighting installation in Charlotte NC, contact a licensed electrician who can install dimmers that work properly with your existing fixtures and LED bulbs.

Step 3: Add Strategic Recessed Lighting

Recessed lighting sounds expensive. It can be. But strategic placement of just a few recessed lights delivers outsized impact for reasonable cost.

Why recessed lighting works:

Clean, modern look. Recessed lights disappear into the ceiling. No bulky fixtures, no visual clutter.

Focused illumination. Recessed lights put light exactly where you need it: kitchen counters, reading nooks, artwork, architectural features.

Increased home value. Quality recessed lighting is a premium feature buyers notice and appreciate.

Budget-friendly recessed lighting strategies:

Start with high-impact areas. You don’t need to light the entire house with recessed fixtures. Add 3-4 lights in key locations:

  • Over kitchen islands or peninsulas
  • In dark hallways or entryways
  • Above bathroom vanities
  • Highlighting artwork or architectural features

Use retrofit LED cans. These install into existing ceilings without major construction. A licensed electrician can typically install retrofit recessed lights in 1-2 hours per fixture, depending on attic access and wiring runs.

Combine with existing lighting. Recessed lights work best as part of a layered lighting strategy. Use them to supplement overhead fixtures, not replace everything.

Charlotte-specific considerations:

Older Charlotte homes often have limited ceiling access. Retrofit recessed lighting solves this problem without tearing out ceilings.

Many Charlotte neighborhoods have strict exterior modification rules. Interior recessed lighting installation in Charlotte NC improves your home without triggering HOA approvals.

Proper installation requires code compliance, especially regarding insulation contact and fire ratings. Licensed professionals ensure recessed lights meet Charlotte electrical codes.

Step 4: Layer Your Indoor Lighting

The biggest lighting mistake homeowners make: relying on a single overhead fixture per room.

Professional lighting design uses layers: ambient, task, and accent lighting. You can achieve this layered approach on a budget.

Ambient lighting:

This is your general, overall room lighting. Ceiling fixtures, recessed lighting, and wall-mounted fixtures provide ambient light.

Budget approach: Update existing ceiling fixtures with modern, efficient options. A new fixture costs $50-200 and transforms a room’s appearance.

Task lighting:

This is focused light for specific activities: reading, cooking, applying makeup, working at a desk.

Budget approach: Add under-cabinet lighting in kitchens ($30-100 for LED strips). Install swing-arm reading lights in bedrooms ($40-80 each). Add vanity lighting in bathrooms ($50-150).

Accent lighting:

This highlights architectural features, artwork, or creates visual interest.

Budget approach: Use affordable track lighting ($60-150) to highlight art or architectural details. Add LED strip lights ($20-50) under shelves or behind TVs for subtle accent lighting.

Practical layering strategy:

Start with one room. Create a properly layered lighting scheme in your most-used space: kitchen, living room, or master bedroom.

Combine new and existing. Keep overhead ambient lighting. Add task lights where needed. Include one or two accent elements.

Use different light sources at different times. Morning might use bright overhead lights. Evening might use just task and accent lights for a completely different feel.

The goal isn’t to light every corner. It’s to have options and flexibility based on how you’re using the space.

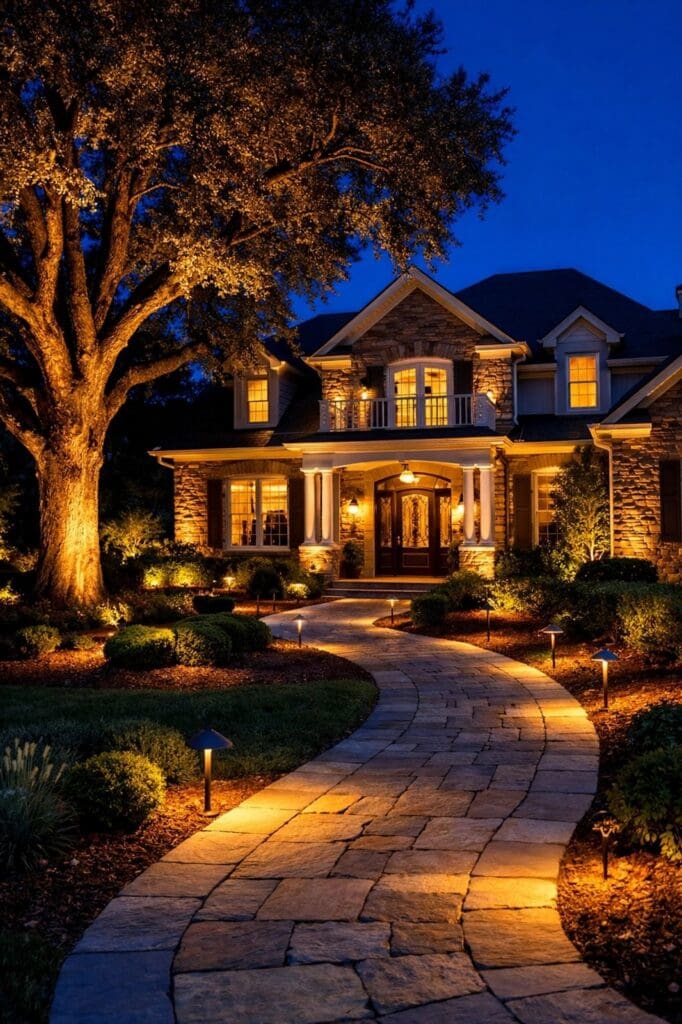
Step 5: Don’t Forget Outdoor Lighting

Outdoor lighting delivers the highest return on investment of any lighting upgrade. It improves curb appeal, increases security, and extends your usable living space.

Budget-friendly outdoor lighting upgrades:

LED pathway lights. Solar-powered LED path lights cost $5-15 each and require zero installation. Place them along walkways, driveways, or garden beds for instant impact.

Updated porch and entry fixtures. Replacing dated outdoor fixtures costs $50-200 per light. This simple change dramatically improves your home’s first impression.

Motion-activated security lights. LED motion sensors cost $20-60 and install easily on existing electrical boxes. They improve security and save energy by only running when needed.

Landscape spotlights. Low-voltage LED landscape lights ($15-40 each) highlight trees, architecture, or garden features. They transform your yard at night for minimal cost.

Where to focus outdoor lighting:

Front entry. This is non-negotiable. Quality lighting at your front door improves safety, security, and curb appeal.

Pathways and steps. Illuminate walking paths to prevent trips and falls. This is especially important for Charlotte’s older neighborhoods with uneven sidewalks.

Outdoor living spaces. If you have a deck, patio, or outdoor seating area, proper lighting extends its usability into evening hours.

Professional outdoor lighting installation:

While DIY solar lights work for pathways, hardwired outdoor lighting requires professional installation. Licensed electricians ensure:

  • Proper weatherproof connections
  • GFCI protection where required
  • Correct wire burial depth
  • Code-compliant fixtures and placement

For comprehensive lighting installation in Charlotte NC that includes both indoor and outdoor upgrades, working with professionals ensures quality results that last.

Making Your Lighting Upgrade Plan Work

You don’t need to do everything at once. Here’s how to prioritize:

Phase 1 (Immediate, low cost):66

  • Convert high-use bulbs to LED
  • Add dimmer switches in 2-3 key rooms
  • Update front entry lighting

Phase 2 (3-6 months):

  • Install recessed lighting in 1-2 high-impact locations
  • Add task lighting where needed
  • Upgrade indoor fixtures in main living spaces

Phase 3 (6-12 months):

  • Complete outdoor lighting scheme
  • Add accent and decorative lighting
  • Install smart controls for whole-home integration

This phased approach spreads costs over time while delivering continuous improvements to how your home looks and functions.

Why Professional Installation Matters

Some lighting upgrades are DIY-friendly. Changing bulbs and plugging in lamps don’t require an electrician.

But many upgrades do:

  • Dimmer switch installation
  • Recessed lighting
  • Hardwired outdoor fixtures
  • Any new circuits or wiring
  • Smart lighting integration

Licensed electricians ensure work meets Charlotte electrical codes, passes inspections, and operates safely. They complete installations faster and correctly the first time.

At Patterson Contracting Services, we help Charlotte homeowners create lighting plans that fit their budget and deliver maximum impact. We can handle everything from simple dimmer installation to complete indoor and outdoor lighting transformations.

Start With One Room

The easiest way to begin: pick one room and upgrade it completely.

Convert to LED. Add a dimmer. Install task lighting where needed. Maybe add 2-3 recessed lights. Update the main fixture.

Live with that room for a few weeks. Notice how it feels different. How you use it more. How much better it looks.

Then move to the next room.

Before you know it, you’ve transformed your entire home’s lighting without ever writing a massive check or enduring a major renovation.

Ready to upgrade your Charlotte home’s lighting? Contact us to discuss your project. We’ll help you create a plan that delivers the results you want at a price that works for your budget.

Whole House Generator Vs Battery Backup: Which Is Better for Your Charlotte Home?

If you’ve ever sat in the dark during a Charlotte thunderstorm, listening to your neighbor’s generator hum while your ice cream melts, you’ve probably thought about backup power. The question is: should you go with a traditional whole house generator or jump into the newer world of battery backup systems?

Both options will keep your lights on when Duke Energy can’t. But they work differently, cost differently, and serve different needs. Let’s break down what each system brings to the table so you can make the right call for your home.

What Is a Whole House Generator?

A whole house generator is exactly what it sounds like: a backup power system that kicks on automatically when your main power goes out. Most run on natural gas or propane, and they sit outside your home like a large AC unit.

Brands like Generac, Kohler, and Briggs & Stratton dominate this space. When the power cuts out, the generator senses it within seconds and fires up, restoring electricity to your home. As long as you have fuel, it’ll keep running.

The appeal is straightforward: unlimited runtime during extended outages. If a storm knocks out power for three days, your generator will run for three days. You won’t need to ration power or choose which appliances to keep on. Everything stays normal.

What Is Battery Backup?

Battery backup systems, like the Tesla Powerwall, LG Chem, or Enphase, store electricity in large lithium-ion batteries installed in your garage or on an exterior wall. They’re often paired with solar panels, but they can also charge from the grid during off-peak hours.

When the power goes out, the battery seamlessly takes over. No lag, no engine noise: just silent, instant backup power. The catch? You’re working with a finite amount of stored energy, typically between 5 and 15 kilowatt-hours per battery unit.

Think of it like this: a generator is a gas station that never closes. A battery is a gas tank that eventually runs empty (unless the sun comes out and you’ve got solar panels recharging it).

The Cost Reality: Upfront vs Long-Term

Let’s talk money, because this is where things get interesting.

A professionally installed whole house generator in Charlotte typically runs between $7,000 and $15,000, depending on the size and your home’s electrical setup. That includes the unit, transfer switch, gas line hookup, and labor from a licensed electrical contractor in Charlotte NC.

Battery backup systems? They’re pricier upfront. A Tesla Powerwall or similar system: especially when paired with solar: can easily hit $25,000 to $30,000 or more. That’s a tough pill to swallow.

But here’s where it flips: over 20 years, battery systems paired with solar often come out cheaper. One recent analysis found that a solar-plus-battery setup cost around $39,434 total over two decades, while a natural gas generator cost $78,012 when you factor in fuel, maintenance, and replacement costs.

Why? Because battery systems reduce your monthly electric bill every single day. Generators just sit there until the power goes out. They don’t save you money: they cost you money in maintenance and fuel, even when they’re not running.

Runtime: How Long Will the Power Stay On?

This is where generators shine. As long as you’ve got natural gas flowing or propane in the tank, your generator will keep running. Three days? No problem. A week? Sure, if you keep the propane topped off.

Battery systems are more limited. A single Powerwall stores about 13.5 kWh of usable energy. That might power your essentials: fridge, some lights, internet, a few outlets: for 8 to 12 hours, depending on your usage. If you want more capacity, you can stack multiple batteries, but that adds cost.

If you’ve got solar panels paired with your battery, though, the game changes. Sunny days can recharge your batteries, giving you continuous power as long as the weather cooperates. In Charlotte, where we get plenty of sunshine between storms, that’s a real advantage.

For short outages (a few hours to a day), battery backup is perfect. For multi-day blackouts caused by ice storms or hurricanes, generators have the edge: unless you’ve got a robust solar-plus-battery setup.

Maintenance: What’s the Real Work?

Generators require regular maintenance. At minimum, you need an annual service visit, which costs between $200 and $600. Oil changes, filter replacements, battery checks: it’s like owning a car you never drive but still have to maintain.

They also need to run periodically to stay in good shape, so expect a weekly self-test cycle where the generator fires up for a few minutes. If something goes wrong: and things do go wrong: you’re calling a technician and paying for parts and labor.

Battery systems? Almost zero maintenance. Once Patterson Contracting Services installs your system and gets it up and running, you mostly just forget about it. No oil changes, no fuel filters, no moving parts to wear out. The batteries themselves degrade slowly over time (usually lasting around 10 years), but during that decade, you’re not doing much besides watching your energy bill shrink.

Charlotte Weather: What Should You Prepare For?

Living in Charlotte means dealing with summer thunderstorms, occasional ice storms, and the rare tropical system that decides to wander inland. Most of our outages are short: a few hours, maybe half a day. But every few years, we get hit with something bigger.

For typical Charlotte weather patterns, battery backup handles most situations beautifully. A quick afternoon storm knocks out power? Your battery keeps everything running until Duke gets things sorted. You might not even notice the outage.

For the big events: like that 2014 ice storm that left some neighborhoods dark for days: a generator installation in Charlotte NC makes more sense. If you live in a heavily wooded area where storms frequently take down trees and power lines, a generator’s unlimited runtime is hard to beat.

The Environmental and Noise Factor

Here’s something your neighbors will appreciate: battery systems are silent. Zero noise, zero emissions, zero fossil fuels. They just work quietly in the background.

Generators? Not so much. Even the “quiet” models make noise: think lawnmower or loud air conditioner. If your unit is near a neighbor’s bedroom window, don’t be surprised if it creates tension during a 3 a.m. outage. They also burn fuel and produce emissions, which won’t matter much during an emergency but does add up over time.

If you care about your carbon footprint or have close neighbors, battery backup is the friendlier option.

Lifespan: How Long Will It Last?

Generators typically last 20 to 30 years with proper maintenance. They’re mechanical workhorses built to run for decades.

Battery systems have shorter lifespans: around 10 years on average. After that, the battery capacity degrades enough that you’ll likely want to replace the unit. Technology is improving, though, and future batteries will probably last longer.

So if you’re thinking long-term, generators win on longevity. But remember: that 20-year generator will also rack up 20 years of maintenance costs, fuel expenses, and repairs.

Which One Is Right for Your Charlotte Home?

Here’s the honest answer: it depends on what you value most.

Choose a whole house generator if:

  • You want the lowest upfront cost
  • You experience frequent, long-duration outages
  • You need high power output for large homes or power-hungry equipment
  • You don’t have space or budget for solar panels
  • You’re not worried about noise or emissions

Choose battery backup if:

  • You want to reduce your monthly electric bill while also having backup power
  • Most of your outages are short (under 24 hours)
  • You value quiet, clean energy
  • You’re planning to add solar panels (or already have them)
  • You’re thinking long-term savings over upfront cost

And here’s a pro tip: you don’t have to choose just one. Some homeowners install both. The battery handles everyday outages silently and efficiently, while the generator kicks in during extended emergencies or when the battery runs low. It’s the best of both worlds, though obviously the most expensive option.

Get Expert Guidance from Patterson Contracting Services

Whether you’re leaning toward a generator installation in Charlotte NC or exploring battery backup options, the most important step is working with a licensed electrical contractor in Charlotte NC who knows the local code requirements, weather patterns, and utility hookups.

At Patterson Contracting Services, we’ve installed both whole house generators and battery backup systems across Charlotte neighborhoods: from Dilworth to Ballantyne to Myers Park. We’ll assess your home’s electrical panel, talk through your backup power needs, and give you an honest recommendation based on your situation.

We’re not here to upsell you on the most expensive option. We’re here to help you make the right choice for your home and family.

Ready to talk backup power? Reach out to Patterson Contracting Services and let’s figure out what makes sense for your Charlotte home. Because when the lights go out, you’ll be glad you planned ahead.

 Do You Really Need a Panel Upgrade for Your EV Charger? (And How to Know for Sure)

You just bought an electric vehicle. Smart move. Lower fuel costs, better for the environment, and you get to skip gas stations forever.

But now you need to charge it at home. And someone told you that means upgrading your electrical panel. That’s going to cost thousands, right?

Maybe. Maybe not.

Here’s what most Charlotte homeowners don’t realize: about 80% of homes can actually support EV charging without a full panel upgrade. The problem is that many people get talked into expensive upgrades they don’t actually need.

Let me show you how to figure out what your home really needs.

Understanding Your Electrical Panel

Your electrical panel is the heart of your home’s electrical system. It takes power from the utility company and distributes it to every circuit in your house.

Panels are rated by amperage. That number tells you how much total electrical current your home can handle at once.

200-amp panels are standard in newer Charlotte homes. If you bought or built in the last 20 years, you probably have one of these. Good news: you can almost certainly add an EV charger without upgrading.

100-amp panels were common from the 1960s through the 1990s. Many homes in neighborhoods like Dilworth, Plaza Midwood, and NoDa still have these. Whether you need an upgrade depends on what else is running in your home.

60-amp panels show up in older Charlotte homes built before 1960. If you’ve got one of these, you’re definitely looking at an upgrade. Modern homes simply use too much power for a 60-amp panel to handle safely.

But here’s the thing: the number on your panel doesn’t tell the whole story. What matters is how much of that capacity you’re actually using.

Load Calculations: The Math That Matters

When a licensed electrician evaluates your home for EV charger installation in Charlotte NC, they should perform a load calculation.

This isn’t guesswork. It’s actual math based on the National Electrical Code.

A proper load calculation accounts for:

  • Your home’s square footage
  • Major appliances (HVAC, water heater, stove, dryer)
  • Lighting and receptacles
  • Any other significant electrical loads
  • How much power your EV charger will draw

The calculation shows your total connected load versus your available capacity. If you’re using 160 amps on a 200-amp panel, you’ve got 40 amps of available capacity. That’s enough for most Level 2 EV chargers.

If your calculation shows you’re already at 190 amps, adding a 50-amp EV charger would overload your system. That’s when you need to look at solutions.

The National Electrical Code requires keeping panels below 80% of their rated capacity for continuous loads. For a 200-amp panel, that means staying under 160 amps. This safety margin prevents overheating and potential fire hazards.

Why Some Electricians Jump to “You Need an Upgrade”

Here’s an uncomfortable truth: doing a proper load calculation takes time and knowledge. It’s easier and faster to just say “you need a panel upgrade” than to sit down and run the numbers.

Some electricians recommend upgrades out of genuine caution. Liability concerns are real. If they underestimate your load and something goes wrong, they’re responsible.

Others recommend upgrades because panel replacement is profitable work. I’m not saying every electrician who recommends an upgrade is trying to upsell you. But you should understand that not all recommendations are based purely on technical necessity.

That’s why getting a second opinion matters. If someone tells you that you need a $3,000-$5,000 panel upgrade before you can charge your EV, ask them to show you the load calculation. ask them what alternatives exist.

Because alternatives do exist.

Load Management Devices: The Smart Alternative

Load management systems have changed the game for EV charging in homes with limited panel capacity.

These devices monitor your home’s electrical usage in real-time. When your panel is approaching capacity, the system automatically reduces power to your EV charger.

Think of it like this: if you’re running your electric dryer, HVAC, and cooking dinner, the load management system might temporarily dial your EV charging down from 50 amps to 30 amps. When those other loads finish, charging ramps back up.

Your car still charges overnight. You just avoid overloading your panel.

Popular load management systems include:

  • Span Smart Panel
  • Schneider Electric Wiser Energy
  • Emporia Vue
  • Sense Energy Monitor with smart EV charger integration

These systems cost significantly less than a full panel upgrade. We’re talking $1,500-$2,500 installed versus $4,000-$8,000 for a panel replacement.

For many Charlotte homes with 100-amp or 200-amp panels that are running close to capacity, load management is the perfect solution.

When You Actually Need a Panel Upgrade

Let’s be clear: sometimes you really do need an upgrade. Here’s when it’s non-negotiable:

Your panel is recalled or dangerous. Federal Pacific and Zinsco panels are known fire hazards. If you have one, replace it immediately, EV charger or not.

Your panel is severely outdated. Panels from the 1950s through 1970s weren’t designed for modern electrical loads. They often have inadequate capacity and outdated safety features.

Your load calculation shows you’re maxed out. If you’re already at 80% capacity or higher, adding an EV charger isn’t safe without an upgrade or load management solution.

You have a 60-amp panel. There’s just no way around this one. Modern homes need more capacity than a 60-amp panel can provide.

Your panel shows signs of problems. Frequent breaker trips, burning smells, humming sounds, hot panel doors, or flickering lights all indicate serious issues. Don’t add an EV charger. Get the panel addressed first.

When you need an upgrade for electrical panel service in Charlotte NC, it’s not optional. But when you need one, you really need one.

Charlotte-Specific Considerations

Charlotte’s housing stock is diverse, and that affects EV charging planning.

Older neighborhoods like Dilworth, Myers Park, and Elizabeth have homes built between 1920 and 1960. Many still have their original electrical systems. These homes often need significant electrical work before adding an EV charger. Panel upgrades are more common here.

Mid-century homes in areas like Eastover and South Charlotte typically have 100-amp or early 200-amp panels. These often have enough capacity with smart load management. Full upgrades are less common but sometimes necessary.

New construction in Ballantyne, Weddington, and surrounding areas comes with 200-amp panels as standard. These homes almost never need upgrades for EV charging.

Townhomes and condos present unique challenges. You might need HOA approval for EV charger installation. Shared electrical infrastructure can complicate things. And older townhome developments may have undersized panels.

Understanding your home’s age and electrical history helps set realistic expectations.

The Real Cost Comparison

Let’s talk numbers.

Basic EV charger installation (assuming adequate panel capacity): $800-$1,500
This includes the charger, dedicated circuit, installation, and permit.

Installation with load management system: $2,000-$3,500
This covers everything above plus the smart load management hardware and configuration.

Installation with panel upgrade: $5,000-$10,000
This includes a new 200-amp panel, main breaker, installation, permit, inspection, plus the EV charger circuit and equipment.

The cost difference is substantial. If you can avoid a panel upgrade with load management, you’re saving $3,000-$7,000.

Even better: many load management systems qualify for utility rebates. Duke Energy offers incentives for smart charging equipment that helps reduce peak demand. Those rebates can offset part of your installation cost.

Questions to Ask Your Electrician

When you’re getting quotes for EV charger installation in Charlotte NC, ask these questions:

“Can you show me the load calculation?” A detailed calculation should break down your current usage and available capacity. If they can’t provide this, they’re guessing.

“What’s my panel currently rated for and what am I using?” You need both numbers to understand your situation.

“Have you considered load management as an alternative to a full upgrade?” If they say no or don’t know what you’re talking about, get a second opinion.

“What rebates or incentives are available?” A knowledgeable electrician should know about current Duke Energy programs and federal tax credits.

“Can I see examples of similar installations you’ve done?” Experience matters, especially with newer technologies like load management systems.

These questions help you separate thorough professionals from those who default to “just upgrade the panel.”

Making the Right Decision for Your Home

Here’s my recommendation: start with a proper assessment.

A licensed electrician should visit your home, examine your panel, review your electrical usage, and run a load calculation. That assessment tells you exactly what you’re working with.

If you have available capacity, great. Install the charger and be done.

If you’re close to capacity but your panel is in good condition, explore load management options first. They’re usually more cost-effective than a full upgrade.

If your panel is outdated, dangerous, or genuinely maxed out, then yes, upgrade it. But make that decision based on facts, not assumptions.

At Patterson Contracting Services, we start every EV installation project with a thorough assessment. We show you the numbers. We explain your options. And we help you make the most cost-effective decision for your situation.

Get a Professional Assessment

You shouldn’t have to guess whether you need a panel upgrade. And you shouldn’t get pushed into expensive work you don’t actually need.

If you’re planning to install an EV charger in your Charlotte home, let’s start with the facts. We’ll assess your electrical system, run the load calculations, and give you an honest recommendation about your options.

Contact Patterson Contracting Services to schedule your EV charger assessment. We’ll help you figure out exactly what your home needs and what it will cost.

Your EV is a smart investment. Your charging installation should be too.

Contact

Thank you for your interest. We look forward to hearing from you soon.