

Recessed lighting looks clean. Modern. It makes any room feel bigger. No wonder Charlotte homeowners want it everywhere.

YouTube makes it look easy. Buy some lights. Cut some holes. Connect some wires. Done in an afternoon.

The short answer

Recessed lighting may look like a simple cut-and-connect project, but ceilings can hide joists, wiring, plumbing, insulation, and HVAC ducts. A professional maps the space and evaluates the circuit before cutting.

Every year, we get calls from homeowners who started a DIY recessed lighting project and got stuck. Some ran into wiring they didn’t expect. Some cut into ceiling joists. Some tripped breakers they couldn’t reset.

The lucky ones call us before something catches fire.

Let’s talk about what’s actually hiding above your ceiling, and why “just cutting a hole” can turn into a serious problem.
Open ceiling cavity with wiring and a work light

The Hidden World Above Your Ceiling

Your ceiling isn’t just drywall and empty space.

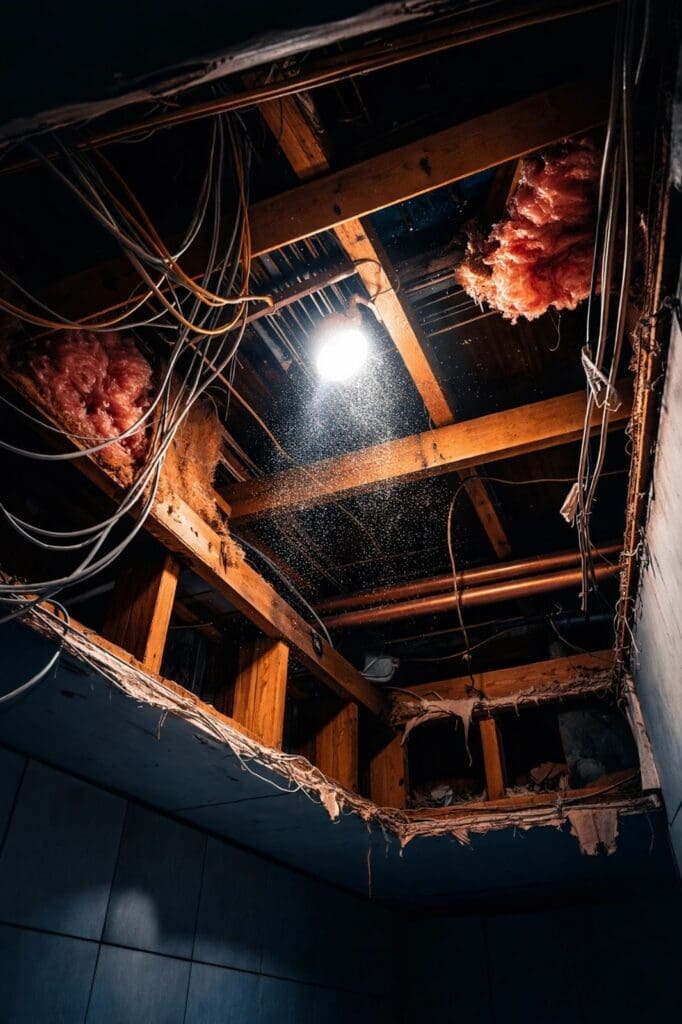
Up there, you have ceiling joists, electrical wiring, possible plumbing, insulation, and HVAC ducts. In a pre-1940 home, the ceiling may also conceal aging knob-and-tube wiring.

You can’t see any of it until you cut.

That’s the first trap. You mark your spots based on a YouTube template. You grab your hole saw. You cut. And suddenly you’re staring at a joist you just damaged. Or a wire you nicked. Or insulation that’s now falling into your living room.

Professional recessed lighting installation in Charlotte NC starts with knowing what’s up there before cutting anything. We use tools and techniques to map out the space. DIYers usually find out the hard way.

Danger #1: Overloaded Circuits

This is the one most people don’t think about.

Your home’s electrical system has limits. Each circuit can only handle so much load. When you add six new recessed lights to an existing circuit, you might push it past capacity.

The result? Breakers that trip constantly. Or worse: breakers that should trip but don’t because they’re old or faulty.

Overloaded circuits generate heat. Heat in your walls and ceiling. Heat you can’t see. This is how electrical fires start.

A residential electrician in Charlotte NC will calculate the load before installing anything. We check:

  • What’s already on that circuit
  • The wire gauge and breaker rating
  • Whether you need a new dedicated circuit

Most DIY tutorials skip this entirely. They assume your existing wiring can handle whatever you throw at it. Bad assumption.
Recessed light surrounded by attic insulation

Danger #2: Fire Hazards and Insulation

Here’s something the hardware store doesn’t tell you: recessed lights and insulation don’t always mix.

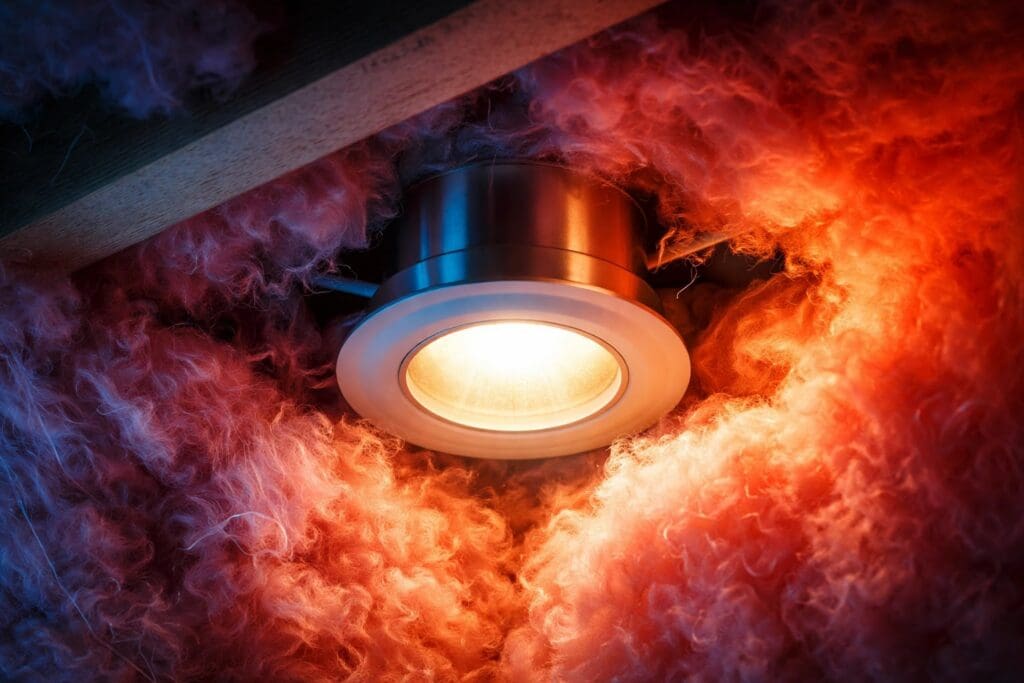
Traditional recessed cans generate heat. A lot of it. If insulation is packed too close, that heat has nowhere to go. The fixture gets hotter. The insulation gets hotter. Given enough time, you’ve got a fire risk sitting above your head.

There are IC-rated (Insulation Contact) fixtures designed for this. But you need to know:

  • Whether your existing fixtures are IC-rated
  • Whether your insulation type is compatible
  • How much clearance you actually have

Patterson uses the 2020 National Electrical Code (NEC) cycle as the active regulatory framework, together with adopted state and local requirements. A licensed electrician works from that framework and the local inspection requirements. A weekend DIYer usually does not.

Danger #3: Structural Damage

Ceiling joists hold up your roof. They’re kind of important.

When you cut a hole in the wrong spot, you can compromise structural integrity. Even a small notch in a joist weakens it. Do that across multiple joists for a row of recessed lights, and you’ve created a real problem.

You need at least 8 inches of vertical clearance above the ceiling for most recessed fixtures. Not every ceiling has that. Older Charlotte homes especially can have tight spaces, unexpected framing, or multiple layers of ceiling material from past renovations.

Before cutting, you need to:

  • Locate every joist
  • Verify clearance depth
  • Plan hole placement to avoid structural members

Measure twice, cut once isn’t just a saying. It’s the difference between a successful install and a call to a structural engineer.

The “Canless” Light Misconception

You’ve probably seen canless LED recessed lights at the hardware store. They’re thinner. Easier to install. No bulky can required.

Some homeowners think this means they can skip the electrical planning. Just cut a small hole, connect to existing wiring, done.

Not quite.

Canless lights still draw power. They still add load to your circuits. They still need proper connections that meet code. The junction box requirements are different, but they exist.

And here’s the thing: because canless lights are easier to install, people tend to install more of them. A dozen canless LEDs on an old 15-amp circuit is still a recipe for problems.

The fixture being smaller doesn’t make the electrical planning optional.

The Permit and Insurance Problem

This is the trap nobody talks about until it’s too late.

Most jurisdictions require permits for electrical work. Charlotte included. Installing recessed lighting without a permit is technically illegal.

More importantly, if you do unpermitted electrical work and something goes wrong, your homeowner’s insurance may deny your claim.

House fire from faulty wiring? If the insurance adjuster finds unpermitted electrical work, you could be on the hook for everything. We’ve seen it happen.

A licensed residential electrician pulls the proper permits. The work gets inspected. Everything is documented and up to code. Your insurance stays valid.

That peace of mind is worth more than the money you’d save doing it yourself.

What a Professional Installation Actually Looks Like

When Patterson Contracting Services handles recessed lighting installation in Charlotte NC, here’s what happens:

Assessment. We look at your existing electrical system. Panel capacity. Circuit loads. Wire conditions. We figure out what your home can handle before we touch anything.

Planning. We map the ceiling. Locate joists, wiring, and obstacles. Plan fixture placement for even light distribution: typically 4 to 6 feet apart depending on the room.

Permits. We pull the required permits. Your work is legal and documented.

Installation. Holes are cut precisely. Wiring is done to code. Fixtures are properly rated for your insulation situation.

Inspection. The work gets inspected by the city. You get documentation that everything is up to standard.

That’s the difference between a DIY project and professional work. It’s not just about the end result looking good. It’s about knowing the job was done safely and legally.

When DIY Makes Sense (And When It Doesn’t)

Look, we’re not here to say you can’t do anything yourself. Changing a light switch? Swapping a fixture for one with the same wiring? Probably fine for a handy homeowner.

But recessed lighting hits different. You’re cutting into structure. You’re adding load to circuits. You’re dealing with insulation and clearance issues. You’re working in spaces you can’t fully see.

The risk-reward math doesn’t add up for most people.

If you’re planning a recessed lighting project in your Charlotte home, get a professional assessment first. It might turn out your ceilings are perfect for DIY. Or it might turn out there’s knob-and-tube wiring up there that needs attention before you add a single light.

Either way, you’ll know what you’re dealing with.

Get It Done Right

Patterson Contracting Services handles recessed lighting installation throughout the Charlotte area. We also offer electrical safety checks for homeowners who’ve already started a project and want a professional set of eyes on it.

No judgment. Just solutions.

Your ceiling will thank you.

Frequently Asked Questions

What can be hidden above a ceiling?

Ceiling joists, electrical wires, plumbing, insulation, HVAC ducts, and sometimes older wiring can be hidden above a ceiling. That is why the space needs to be mapped before cutting.

Can new recessed lights overload an existing circuit?

Yes. Adding lights can push an existing circuit past its capacity if the current load, wire gauge, and breaker rating are not checked first.

Do canless lights avoid electrical requirements?

No. Canless lights still draw power, add load to circuits, and require proper connections that meet code.


You’ve probably got an HVAC maintenance agreement. You change your filters, schedule tune-ups twice a year, and keep that system running smoothly. Smart move.

But here’s a question: What about your electrical system?

Without power, your HVAC doesn’t matter. Your fridge doesn’t matter. Nothing in your house works. Yet most Charlotte homeowners never think about preventive electrical maintenance until something goes wrong.

The short answer

That's where an electrical energy audit comes in. It does more than identify problems. It can also find energy waste that is putting pressure on your monthly utility bill.

One of our clients said it best: “This is great, we found them date night and family vacation money.”

Let me show you how.

What Is an Electrical Energy Audit?

Patterson uses the 2020 National Electrical Code (NEC) cycle as the active regulatory framework, together with adopted state and local requirements. An electrical energy audit checks the electrical system for safety, hidden faults, and documented energy waste.

A licensed electrician examines:

  • Your electrical panel and circuit capacity
  • Major appliances and their energy draw
  • Lighting systems throughout the home
  • Outlets, switches, and wiring
  • HVAC electrical connections
  • Any inefficiencies or energy waste points

But the real value comes from two specific technologies: thermal imaging and detailed utility analysis.

These aren’t things you can DIY with a YouTube video. They require professional equipment, training, and the experience to know what you’re actually looking at.

Thermal Imaging: Seeing the Invisible

Thermal imaging cameras detect heat signatures that are completely invisible to the naked eye. When we perform an electrical energy audit in Charlotte, we use these cameras to identify problems you didn’t even know existed.

What does thermal imaging reveal?

Hot spots in your electrical panel. If a breaker or connection is running hot, that’s energy waste at best and a fire hazard at worst. These issues show up bright on a thermal scan but would go completely unnoticed otherwise.

Loose connections. A loose wire creates resistance. Resistance creates heat. Heat creates wasted energy and potential danger. Thermal scans catch these issues before they become serious problems.

Hidden electrical faults. A failing junction box in your attic or a wire buried behind a wall creates electrical resistance. Resistance creates heat, and we spot these dangerous, invisible heat signatures before they degrade the insulation around the wire and spark a fire.

Overloaded circuits. Circuits that are handling more load than they should run hotter than normal. We can see this immediately with thermal scanning and recommend solutions before you’re dealing with tripped breakers or worse.

Electrician holding a thermal imaging camera near an electrical panel

Thermal imaging stays within electrical scope: panels, breakers, junction boxes, conductors, and connections. We do not use it to diagnose the building envelope; that work belongs to a BPI Home Energy Rater.

This isn’t guesswork. It’s hard data captured by professional-grade equipment and interpreted by licensed electricians who’ve seen thousands of homes across Charlotte.

Breaking Down Your Electric Bill

Here’s where things get interesting. Most people look at their electric bill, see the total, and either pay it or complain about it. That’s it.

During an electrical energy audit, we do something different. We analyze your actual usage patterns and identify exactly where your money is going.

Electrical baseline. We take instantaneous current readings with a clamp meter to check for phase imbalances, then cross-reference the property’s layout with NEC Article 220 calculated load guidelines to map a safe long-term path.

Smart meter interval data. Most Charlotte residential accounts pay a flat rate unless they explicitly opt into a specialty program. We use Duke’s interval data to hunt continuous vampire loads that draw heavy power 24/7 and to evaluate whether the household’s lifestyle makes it a strong candidate for the Flex Savings Option.

Seasonal variations. Charlotte’s summers are brutal, and winters can be surprisingly cold. We look at how your consumption changes across seasons and determine if those swings are normal or if there’s an efficiency problem.

Rate-plan fit. Duke Energy Carolinas’ Flex Savings Option (FSO) rate plan lets EV owners charge overnight for roughly 7 cents per kWh while avoiding the punitive demand charges of older time-of-use plans.

The goal isn’t just to tell you you’re using too much electricity. The goal is to identify specific, fixable problems that are costing you real money every month.

Real Savings: The “Vacation Money” Story

I mentioned that client quote earlier. Let me give you the full story.

We performed an electrical energy audit for a family in South Charlotte. Nice house, about 2,400 square feet, built in 2008. They called us because their electric bills seemed high, but they didn’t know why.

Our audit found several issues:

Their electrical panel had multiple loose connections causing heat buildup. Not dangerous yet, but inefficient and wasting energy. The massive hidden drain was a malfunctioning pool pump timer running the pump 24/7 through the winter. Nobody noticed because the pump was behind the house.

They had 47 old incandescent recessed lights throughout the house. Every single one was generating heat and drawing way more power than modern LED equivalents. Their water heater was set to 140 degrees, far hotter than necessary, and was located in an unconditioned garage, losing heat constantly.

We created a phased upgrade plan. Some fixes were immediate and inexpensive. Others we scheduled over the next year based on their budget.

The result? Their average monthly electric bill dropped from around $285 to $165.

That’s $120 per month. That’s $1,440 per year.

That’s when they said it: “This is great, we found them date night and family vacation money.”

And they were right. An electrical energy audit didn’t just save them money. It literally funded new experiences for their family.

Developing a Long-Term Upgrade Plan

Here’s what separates a professional electrical energy audit from a simple inspection: we don’t just find problems, we create a roadmap for fixing them.

Not everyone has the budget to address every issue immediately. We get that. So we prioritize:

Safety first. If there’s a hazard, we address it now. No exceptions.

Energy reports, thermal images, calculator, and audit notes on a desk

High-impact, low-cost fixes. These are the quick wins. Replacing incandescent bulbs with LEDs. Adjusting water heater temperature. Installing smart power strips to eliminate phantom loads. These changes pay for themselves quickly.

Medium-term improvements. Upgrading to a smart thermostat, installing occupancy sensors in less-used rooms, or replacing an oversized, inefficient appliance. These require more investment but deliver significant long-term savings.

Major upgrades. Panel upgrades or a complete lighting retrofit are planned around your timeline and budget. Under NEC 2020 Article 230.67, a whole-home Surge Protective Device (SPD) is mandatory for any new or replaced electrical service. Patterson treats it as essential, code-compliant integration that protects sensitive modern electronics when dirty utility power surges back after a blackout. The installed cost is about $350.

The beauty of this approach is that you’re always moving forward. Every few months, you complete another upgrade. Your efficiency improves. Your bills drop. And each improvement helps fund the next one.

It’s not overwhelming. It’s not all at once. It’s a structured plan that makes sense for your home and your budget.

The HVAC Comparison Nobody Talks About

Let’s go back to that HVAC maintenance agreement.

You pay for it every year. You schedule the tune-ups. You replace filters. You do this because you understand that preventive maintenance:

  • Keeps your system running efficiently
  • Prevents expensive breakdowns
  • Extends the life of your equipment
  • Saves money on energy bills

Every single one of those benefits applies to your electrical system too.

But here’s the critical difference: Without power, your HVAC doesn’t work. Without power, nothing works.

Your electrical system is the foundation of your entire home. It powers your HVAC, your refrigerator, your lights, your internet, your security system, everything. Yet most Charlotte homeowners never think about maintaining it until something breaks.

That doesn’t make sense.

An electrical energy audit is preventive maintenance for the most critical system in your home. It identifies problems before they become emergencies. It improves efficiency so you’re not wasting money every month. It extends the life of your electrical components. And it gives you peace of mind that everything is working safely and correctly.

You wouldn’t skip your HVAC tune-up. Why skip your electrical inspection?

What Happens During the Audit

When you schedule an electrical energy audit with Patterson Contracting Services, here’s what you can expect:

Comprehensive visual inspection. We examine your entire electrical system, from the service entrance to every outlet and switch.

Thermal imaging scan. We use professional-grade thermal cameras strictly to find hidden electrical heat signatures from failing breakers, junction boxes, wires, and connections.

Panel assessment. We check your electrical panel for capacity, proper labeling, signs of wear, and safe operation.

Load analysis. We take instantaneous current readings with a clamp meter to check for phase imbalances, and cross-reference the property’s layout with NEC Article 220 calculated load guidelines to map out a safe long-term path.

Utility bill review. We use Duke’s smart meter interval data to identify continuous vampire loads and evaluate whether the Flex Savings Option fits the household’s schedule.

Appliance and lighting assessment. We evaluate major appliances and lighting systems for efficiency and identify upgrade opportunities.

Written report. You get a detailed report of our findings, including thermal images, identified issues, and recommended solutions.

Customized upgrade plan. We create a prioritized, phased plan for addressing any issues we found, scheduled around your timeline and budget.

The on-site audit typically takes about 45 minutes. You leave with prioritized findings and a practical path for the next steps.

Why a Licensed Professional Matters

You might be wondering: “Can’t I just buy a thermal camera online and do this myself?”

Technically, yes. You can buy a consumer-grade thermal camera for a few hundred dollars.

But here’s what you can’t buy online: the training and experience to know what you’re looking at.

A hot spot on a thermal scan could mean a dozen different things. Is it a loose connection? An overloaded circuit? A failing breaker? A problem with the wiring itself? Each requires a different solution.

A licensed electrician in Charlotte NC has spent years learning to diagnose electrical problems. We know what normal looks like. We know what dangerous looks like. We know what inefficient looks like. And we know how to fix it safely and correctly.

Plus, any repairs or upgrades that come from the audit need to be done by a licensed professional anyway. Electrical work requires permits and inspections. It needs to meet Charlotte’s electrical codes. It needs to be done safely.

Starting with a professional electrical inspection in Charlotte NC means you’re getting accurate information and access to the expertise needed to act on it.

Ready to Find Your Vacation Money?

Most Charlotte homeowners have no idea how much money they’re leaving on the table every month. Inefficient systems, outdated lighting, phantom loads, and hidden electrical problems are quietly draining their bank accounts.

An electrical energy audit finds that money and puts it back where it belongs: in your pocket.

Whether you’re planning date nights, saving for a family vacation, or just tired of watching your electric bill climb every month, an audit gives you a clear path to real, measurable savings.

At Patterson Contracting Services, we’ve helped hundreds of Charlotte families reduce their energy costs through professional electrical audits. We’ll show you exactly where your money is going and create a realistic plan to keep more of it.

Frequently Asked Questions

What is an electrical energy audit?

It is a comprehensive inspection of the home’s electrical system that also looks for inefficiency and energy waste.

What can thermal imaging reveal?

Thermal imaging reveals dangerous heat signatures from hidden electrical faults, including failing breakers, junction boxes, wires, and loose connections.

What happens after the audit finds problems?

A professional audit creates a roadmap for fixing what it finds, including a way to prioritize safety and longer-term upgrades.

Graphic for five steps to upgrade a Charlotte home's lighting
The short answer

Most Charlotte homeowners think upgrading their lighting means gutting rooms and spending thousands. That’s not true.

Smart lighting upgrades deliver major impact without major expense. You can transform how your home looks and feels, reduce energy bills, and increase property value with strategic, budget-conscious changes.

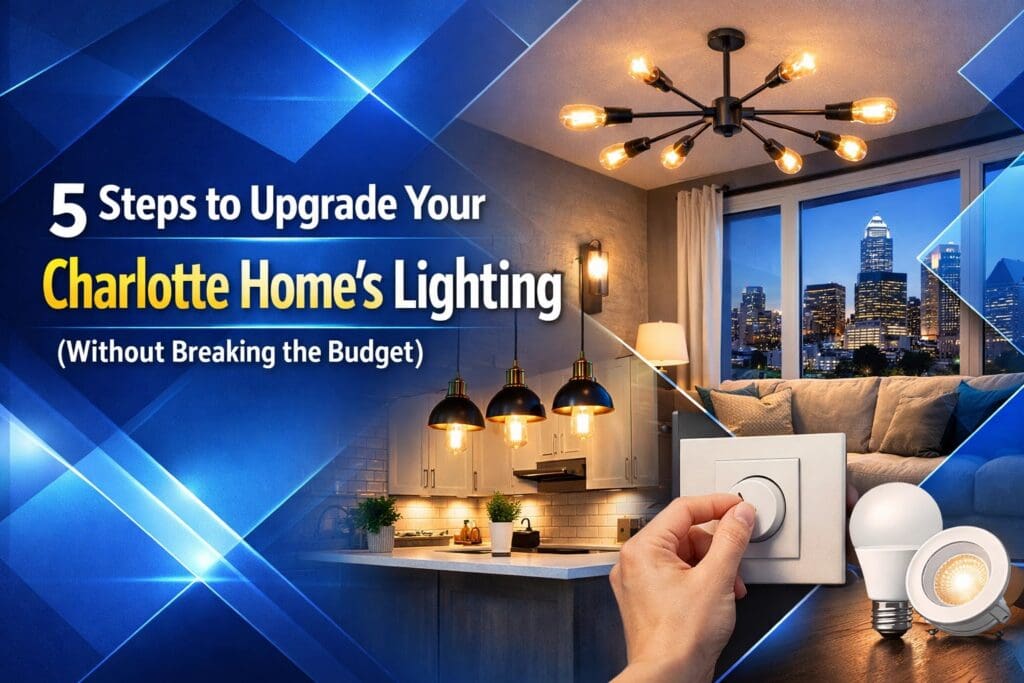
Here are five steps to upgrade your Charlotte home’s lighting without breaking the bank.

Step 1: Convert to LED Throughout Your Home

This is the fastest, easiest, and most cost-effective lighting upgrade you can make.

LED bulbs use approximately 85% less energy than traditional incandescent bulbs. They last 15-25 times longer. And they’ve come down dramatically in price over the past few years.

Why LEDs matter for Charlotte homes:

Your electric bill. Charlotte summers mean air conditioning running constantly. The last thing you need is lighting that generates heat and drives up cooling costs. LEDs run cool and slash energy consumption.

Longer lifespan means fewer replacements. Incandescent bulbs burn out every 1,000 hours. Quality LEDs last 25,000-50,000 hours. That’s years of use without climbing a ladder to change bulbs.

Better light quality. Modern LEDs offer warm, natural light that rivals traditional bulbs. You’re not stuck with that harsh, cold light from early LED technology.

Where to start:

Replace your most-used lights first. Kitchen, living room, bathrooms, and outdoor fixtures get the most use and deliver the fastest payback on LED conversion.

Match color temperature to the room. Use warm white (2700K-3000K) for living spaces and bedrooms. Use bright white (3500K-4100K) for kitchens and workspaces. Use daylight (5000K-6500K) for garages and outdoor security lighting.

Consider smart LED bulbs for rooms where you want dimming or color control without rewiring. These connect to your phone and cost only slightly more than standard LEDs.

Step 2: Install Dimmer Switches and Smart Controls

Here’s a secret: changing how you control your lights often matters more than changing the lights themselves.

A basic dimmer switch costs $15-30. Installation takes 15 minutes for a licensed electrician. But the impact is immediate and dramatic.

What dimmers do for your home:

Mood and ambiance. Bright overhead lighting is harsh for watching TV or entertaining. Dimmed lighting creates atmosphere without buying new fixtures.

Before-and-after comparison of living room lighting

Energy savings. Dimming lights by just 25% cuts energy use by approximately 20% and extends bulb life significantly.

Flexibility. Morning coffee needs different lighting than evening wine. Dimmers let you adjust for time of day, activity, and mood.

Smart switch upgrades:

Smart dimmer switches connect to your phone, voice assistant, or home automation system. They cost $40-80 each and offer features like:

  • Scheduling lights to turn on/off automatically
  • Creating lighting scenes for different activities
  • Remote control from anywhere
  • Integration with motion sensors and other smart home devices

Where to install dimmers:

Dining room. This is the most impactful location for a dimmer. Bright for homework, dimmed for dinner parties.

Living room. Overhead lighting that dims lets you adjust for TV watching, reading, or entertaining.

Bedrooms. Dimmed lights before bed help you wind down. Full brightness in the morning helps you wake up.

Kitchen. Dimmers over islands or breakfast areas create flexibility. Bright for cooking, dimmed for casual meals.

For professional lighting installation in Charlotte NC, contact a licensed electrician who can install dimmers that work properly with your existing fixtures and LED bulbs.

Step 3: Add Strategic Recessed Lighting

Recessed lighting sounds expensive. It can be. But strategic placement of just a few recessed lights delivers outsized impact for reasonable cost.

Why recessed lighting works:

Clean, modern look. Recessed lights disappear into the ceiling. No bulky fixtures, no visual clutter.

Focused illumination. Recessed lights put light exactly where you need it: kitchen counters, reading nooks, artwork, architectural features.

Increased home value. Quality recessed lighting is a premium feature buyers notice and appreciate.

Budget-friendly recessed lighting strategies:

Start with high-impact areas. You don’t need to light the entire house with recessed fixtures. Add 3-4 lights in key locations:

  • Over kitchen islands or peninsulas
  • In dark hallways or entryways
  • Above bathroom vanities
  • Highlighting artwork or architectural features

Use retrofit LED cans. These install into existing ceilings without major construction. A licensed electrician can typically install retrofit recessed lights in 1-2 hours per fixture, depending on attic access and wiring runs.

Combine with existing lighting. Recessed lights work best as part of a layered lighting strategy. Use them to supplement overhead fixtures, not replace everything.

Charlotte-specific considerations:

Older Charlotte homes often have limited ceiling access. Retrofit recessed lighting solves this problem without tearing out ceilings.

Many Charlotte neighborhoods have strict exterior modification rules. Interior recessed lighting installation in Charlotte NC improves your home without triggering HOA approvals.

Patterson uses the 2020 National Electrical Code (NEC) cycle as the active regulatory framework, together with adopted state and local requirements. Proper installation requires code compliance, especially regarding insulation contact and fire ratings.

Step 4: Layer Your Indoor Lighting

The biggest lighting mistake homeowners make: relying on a single overhead fixture per room.

Professional lighting design uses layers: ambient, task, and accent lighting. You can achieve this layered approach on a budget.

Ambient lighting:

This is your general, overall room lighting. Ceiling fixtures, recessed lighting, and wall-mounted fixtures provide ambient light.

Budget approach: Update existing ceiling fixtures with modern, efficient options. A new fixture costs $50-200 and transforms a room’s appearance.

Task lighting:

This is focused light for specific activities: reading, cooking, applying makeup, working at a desk.

Budget approach: Add under-cabinet lighting in kitchens ($30-100 for LED strips). Install swing-arm reading lights in bedrooms ($40-80 each). Add vanity lighting in bathrooms ($50-150).

Accent lighting:

This highlights architectural features, artwork, or creates visual interest.

Budget approach: Use affordable track lighting ($60-150) to highlight art or architectural details. Add LED strip lights ($20-50) under shelves or behind TVs for subtle accent lighting.

Practical layering strategy:

Start with one room. Create a properly layered lighting scheme in your most-used space: kitchen, living room, or master bedroom.

Combine new and existing. Keep overhead ambient lighting. Add task lights where needed. Include one or two accent elements.

Use different light sources at different times. Morning might use bright overhead lights. Evening might use just task and accent lights for a completely different feel.

The goal isn’t to light every corner. It’s to have options and flexibility based on how you’re using the space.

Step 5: Don’t Forget Outdoor Lighting

Outdoor lighting delivers the highest return on investment of any lighting upgrade. It improves curb appeal, increases security, and extends your usable living space.

Budget-friendly outdoor lighting upgrades:

LED pathway lights. Solar-powered LED path lights cost $5-15 each and require zero installation. Place them along walkways, driveways, or garden beds for instant impact.

Updated porch and entry fixtures. Replacing dated outdoor fixtures costs $50-200 per light. This simple change dramatically improves your home’s first impression.

Motion-activated security lights. LED motion sensors cost $20-60 and install easily on existing electrical boxes. They improve security and save energy by only running when needed.

Landscape spotlights. Low-voltage LED landscape lights ($15-40 each) highlight trees, architecture, or garden features. They transform your yard at night for minimal cost.

Where to focus outdoor lighting:

Front entry. This is non-negotiable. Quality lighting at your front door improves safety, security, and curb appeal.

Pathways and steps. Illuminate walking paths to prevent trips and falls. This is especially important for Charlotte’s older neighborhoods with uneven sidewalks.

Outdoor living spaces. If you have a deck, patio, or outdoor seating area, proper lighting extends its usability into evening hours.

Exterior pathway lighting around a house at night

Professional outdoor lighting installation:

While DIY solar lights work for pathways, hardwired outdoor lighting requires professional installation. Licensed electricians ensure:

  • Proper weatherproof connections
  • GFCI protection where required
  • Correct wire burial depth
  • Code-compliant fixtures and placement

For comprehensive lighting installation in Charlotte NC that includes both indoor and outdoor upgrades, working with professionals ensures quality results that last.

Making Your Lighting Upgrade Plan Work

You don’t need to do everything at once. Here’s how to prioritize:

Phase 1 (Immediate, low cost):

  • Convert high-use bulbs to LED
  • Add dimmer switches in 2-3 key rooms
  • Update front entry lighting

Phase 2 (3-6 months):

  • Install recessed lighting in 1-2 high-impact locations
  • Add task lighting where needed
  • Upgrade indoor fixtures in main living spaces

Phase 3 (6-12 months):

  • Complete outdoor lighting scheme
  • Add accent and decorative lighting
  • Install smart controls for whole-home integration

This phased approach spreads costs over time while delivering continuous improvements to how your home looks and functions.

Why Professional Installation Matters

Some lighting upgrades are DIY-friendly. Changing bulbs and plugging in lamps don’t require an electrician.

But many upgrades do:

  • Dimmer switch installation
  • Recessed lighting
  • Hardwired outdoor fixtures
  • Any new circuits or wiring
  • Smart lighting integration

Licensed electricians ensure work meets Charlotte electrical codes, passes inspections, and operates safely. They complete installations faster and correctly the first time.

At Patterson Contracting Services, we help Charlotte homeowners create lighting plans that fit their budget and deliver maximum impact. We can handle everything from simple dimmer installation to complete indoor and outdoor lighting transformations.

Start With One Room

The easiest way to begin: pick one room and upgrade it completely.

Convert to LED. Add a dimmer. Install task lighting where needed. Maybe add 2-3 recessed lights. Update the main fixture.

Live with that room for a few weeks. Notice how it feels different. How you use it more. How much better it looks.

Then move to the next room.

Before you know it, you’ve transformed your entire home’s lighting without ever writing a massive check or enduring a major renovation.

Frequently Asked Questions

Where should a lighting upgrade start?

Start with the most-used lights, including the kitchen, living room, bathrooms, and outdoor fixtures. LED conversion is the fastest, easiest, and most cost-effective lighting upgrade.

Can lighting controls make a noticeable difference?

Yes. Changing how you control your lights can matter more than changing the lights themselves, and dimmers add flexibility for different times, activities, and moods.

Do all lighting upgrades need to happen at once?

No. Start with one room and upgrade it completely before moving to the next space.

Contact

Thank you for your interest. We look forward to hearing from you soon.